Fractal Design ERA ITX Chassis Review
Era is a unique and elegantly understated feat of both design and technical engineering
System Build & Testing
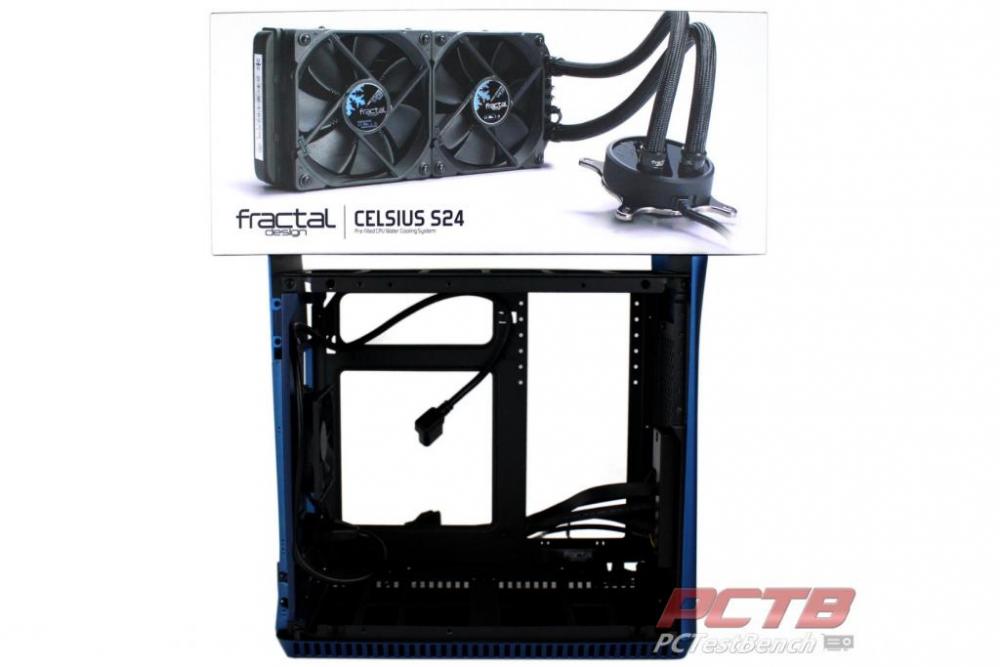
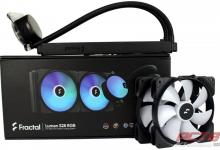
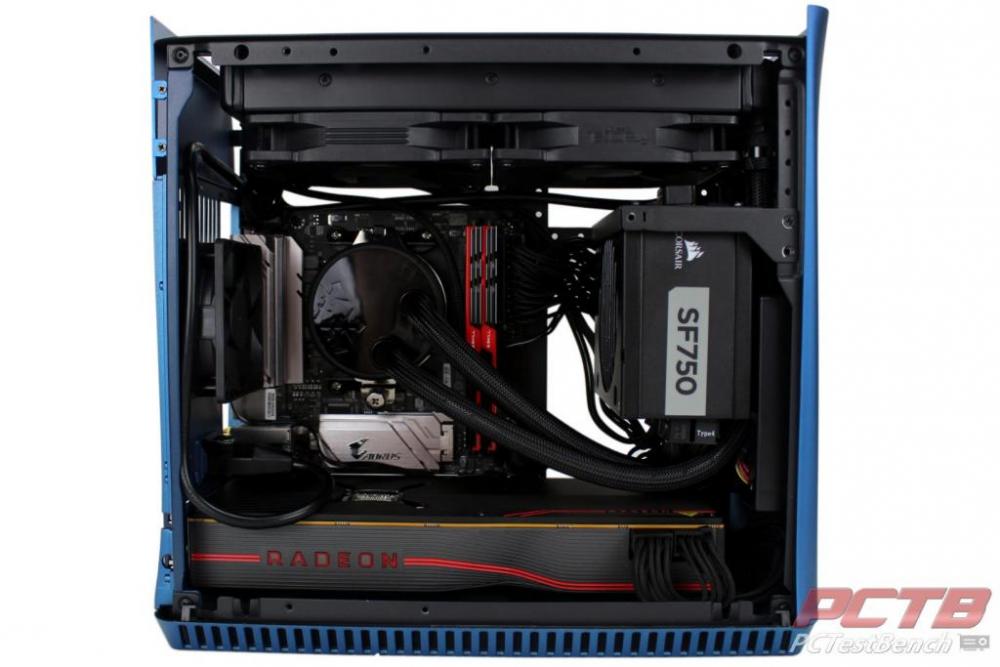
We happened to have a Fractal Celsius S24 already sitting on the shelf, so we decided to give it a go here.
Internals will be as follows:
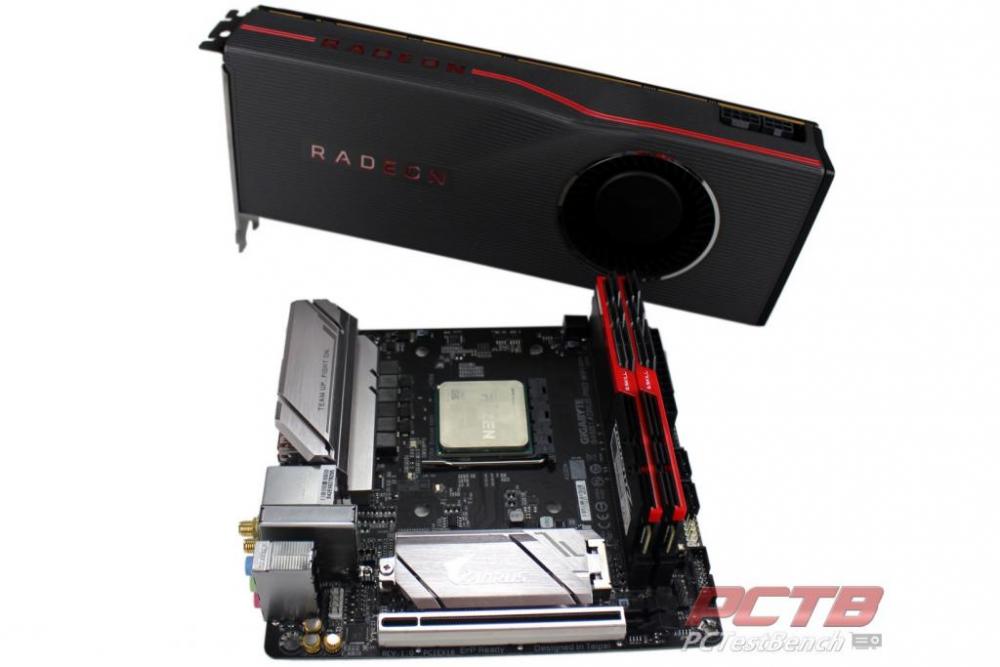
Gigabyte B450 I AORUS PRO WIFI
AMD Ryzen 7 2700X
16GB of G.Skill Trident Z 3000MHz
AMD Radeon RX 5700XT
512GB OCZ RD400 M.2
Corsair SF750 SFX Power Supply.
With most compact builds, you’ll not want to really go ham on mounting everything until you check clearances, cable lengths, and similar. Sometimes things need to move or flip around to solve clearance issues or routing as you build, so you’ll see we only install everything with a screw or two until we are sure about everything.
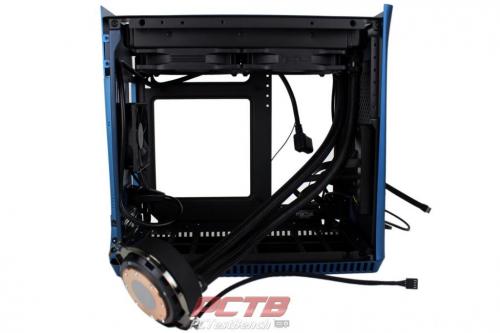
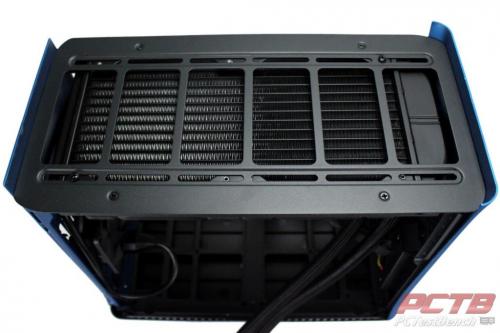
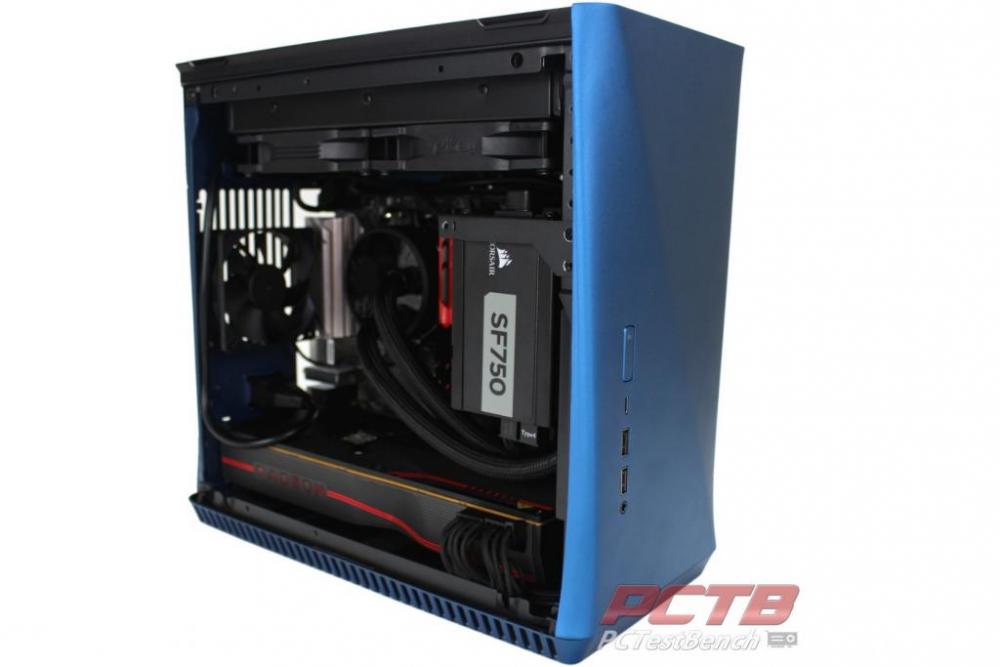
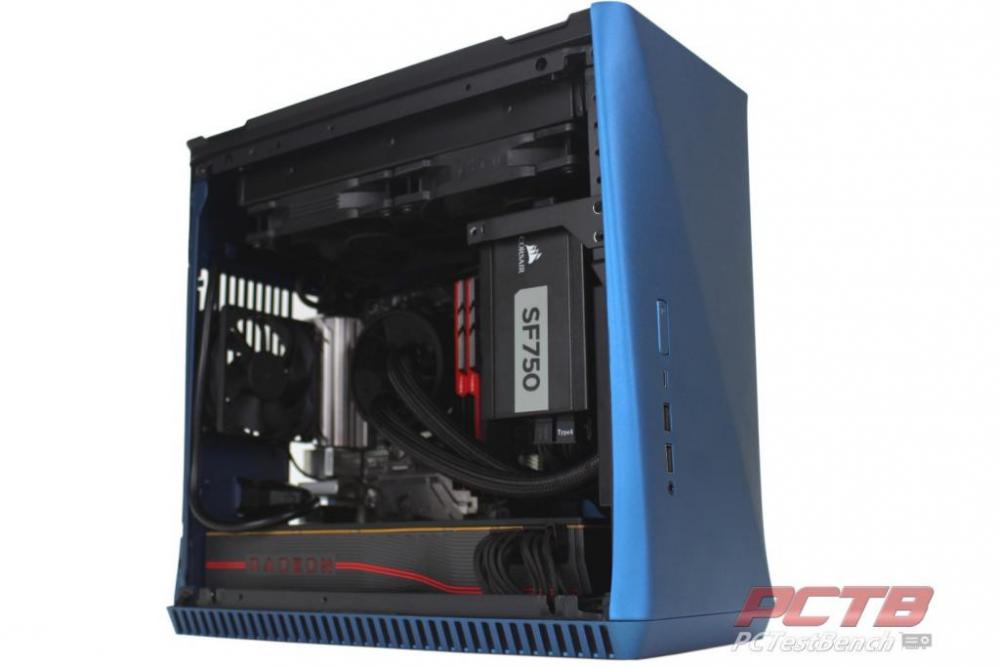
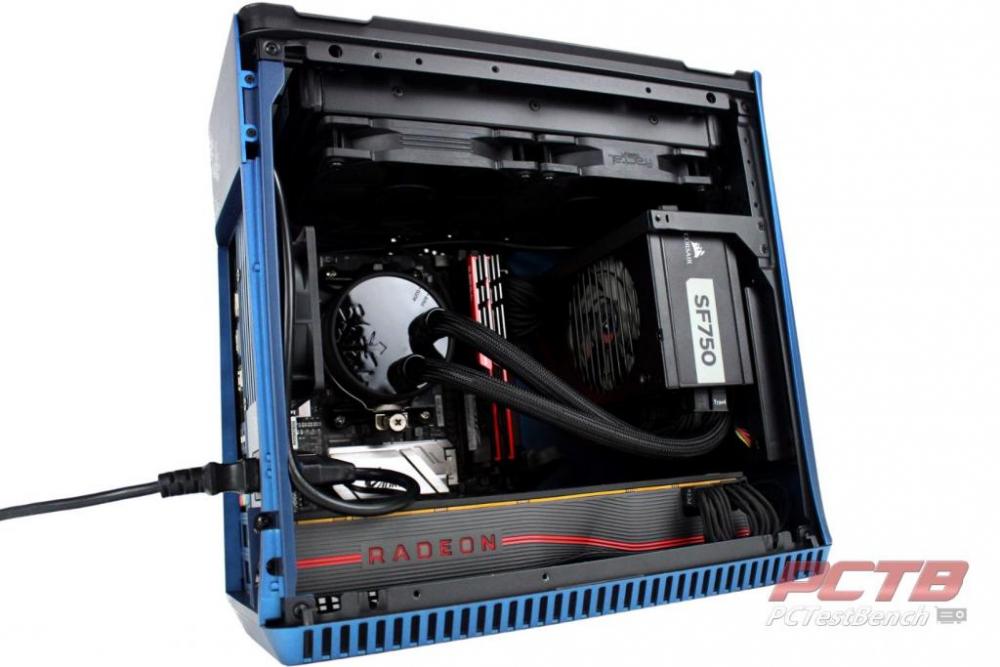
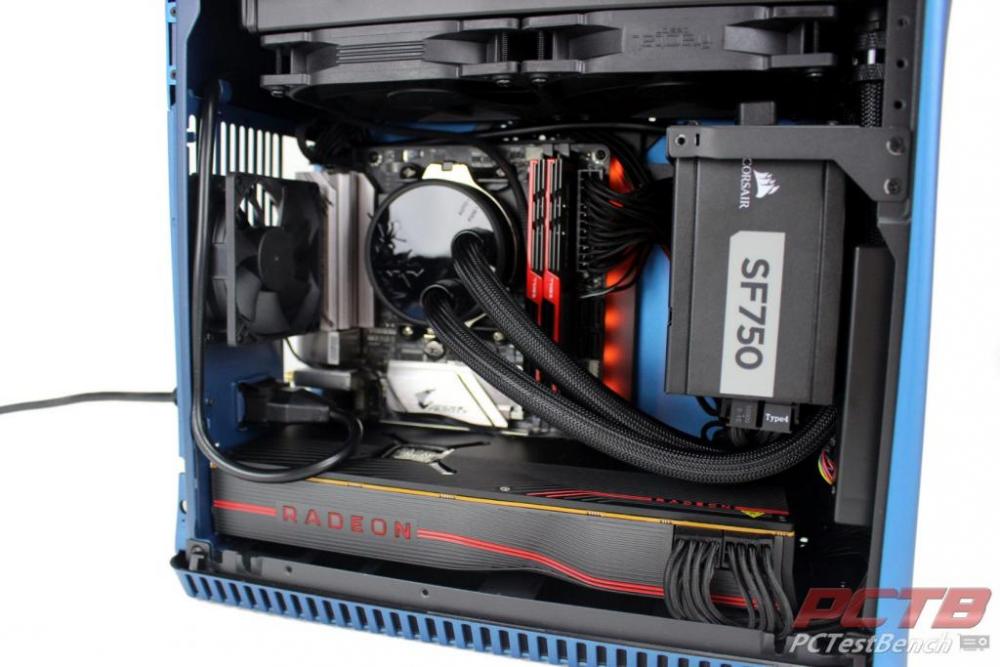
We started by loosely mounting the Celsius S24 cooler with two screws in opposite corners to gauge tubing runs and power supply mounting.
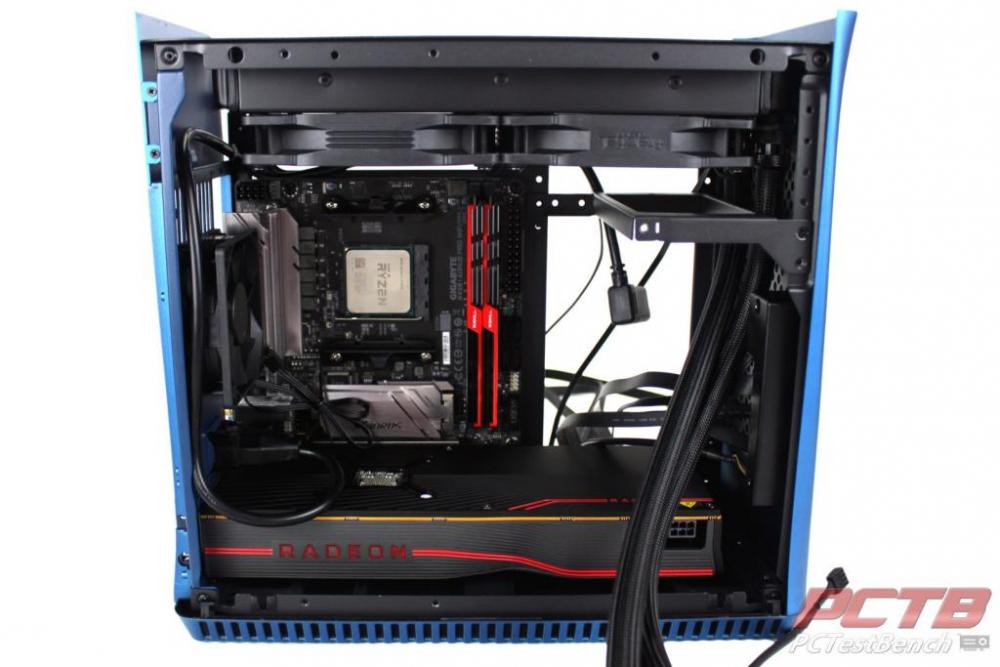
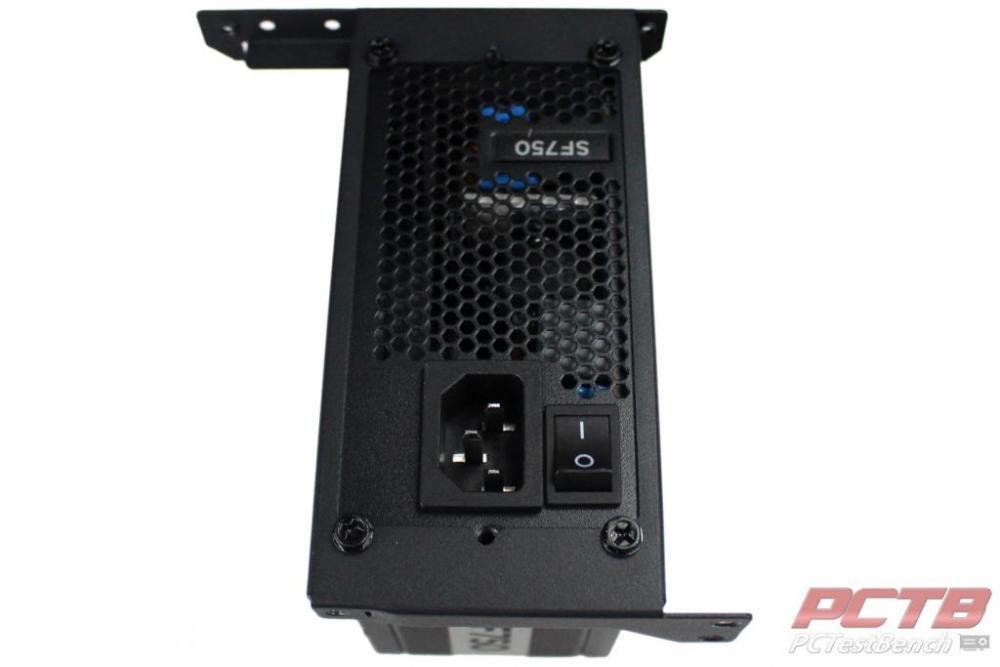
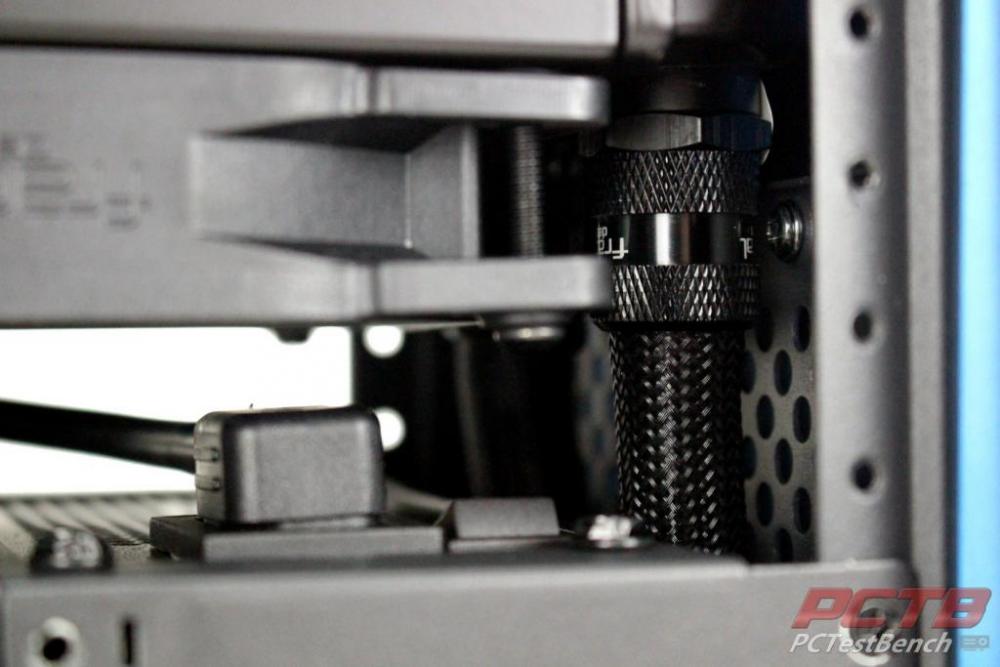
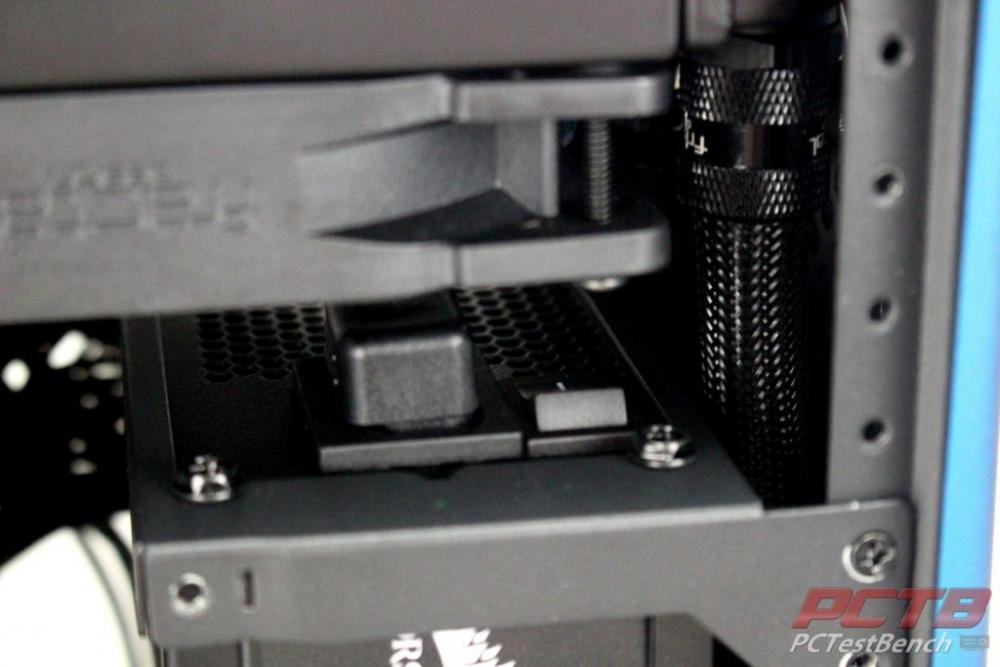
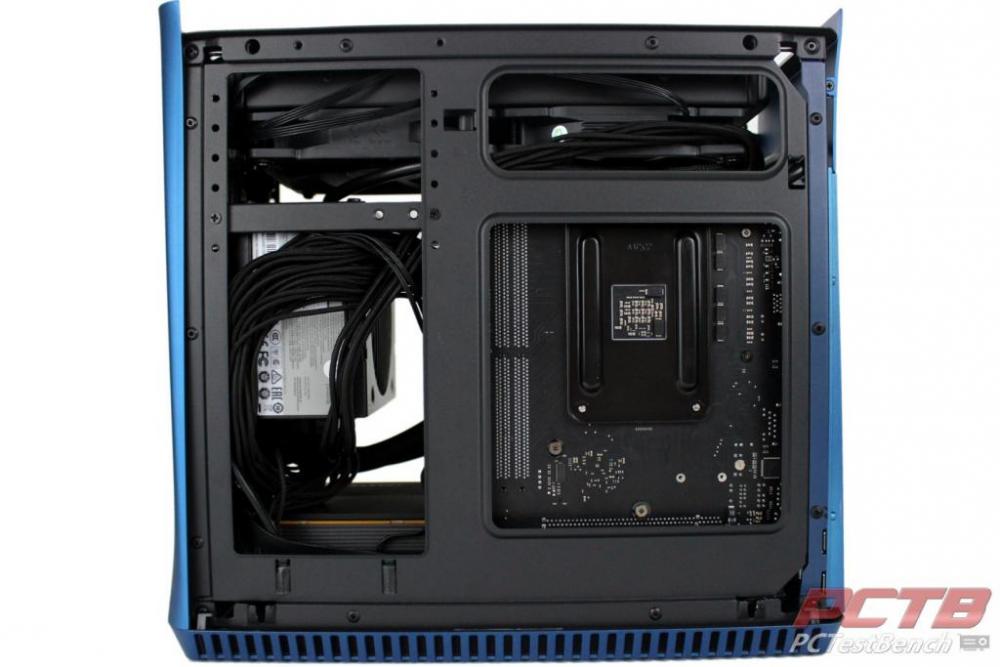
After this we slapped the motherboard in with CPU and ram pre-installed and then installed the GPU. We also loosely installed the SFX power supply bracket so we could hold the power supply in place and make sure the power plug cleared the fans on the cooler.
Corsair’s tiny SF750 power supply mounts like any other SFX power supply. We turned it so the power switch was towards the main door on the left side.
After this, we ran all of the power cables, which consist of the main 24-pin, a single 8-pin EPS, and a single GPU cable with twin 6+2 connectors for the Radeon 5700XT. You can access the rear of the CPU socket easily so we went ahead and installed the business end of the liquid cooler at this stage. It’s at a slight angle so as not to pull too tightly on the hoses, but it won’t hurt anything and this isn’t a windowed case anyway.
The Celsius S24 cooler can run the tubing right behind the power supply towards the front of the case as long as it’s all the way forward itself.
We made sure the power supply’s normally external switch is turned ‘on’ now before we have to open the door again later.
At this point, we ran the front panel cables to the appropriate places on the board, connected the fan cables from the cooler, and cable managed everything. There is a ton of space for slack cable between the GPU and the motherboard tray, so we hid most of the slack there.
For as compact as the ERA is, there is a ton of space. There are a lot of places to stuff cables that don’t affect airflow, so you end up with a very clean build.
We have a pretty potent 8-core system in here, so let’s close her up and see how it does thermally.
Testing
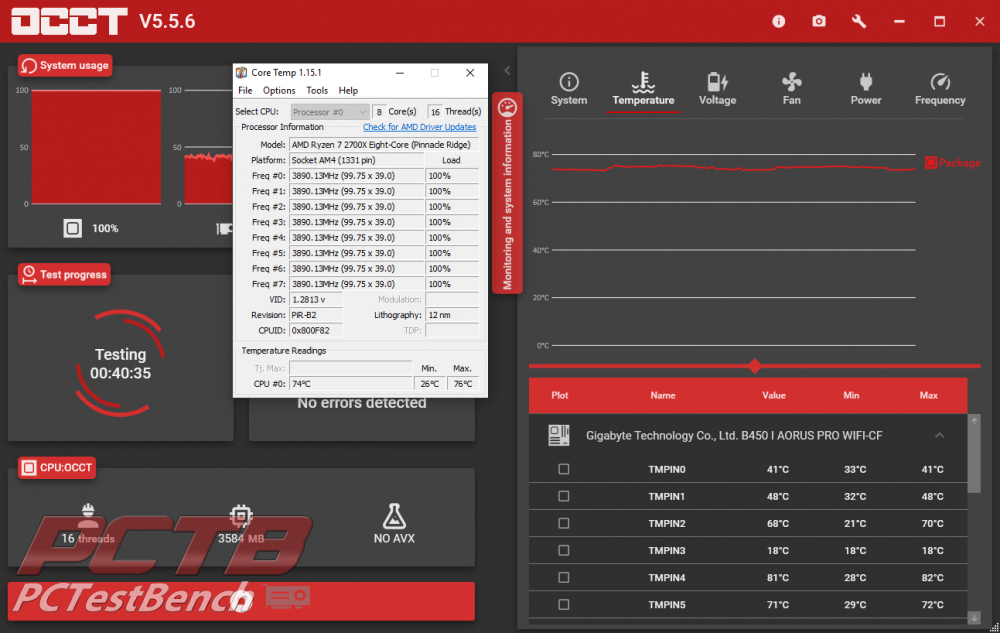
We start with the glass cover, the least amount of ventilation, and likely the worst temps. After getting distracted and running a bit over our 30-minute run time, we see a CPU max temp of 76C on the CPU. We would love to tell you noise levels, but our sound meter only goes down to 30dB and unless you stick it in the fan blades, it’s too quiet to register.
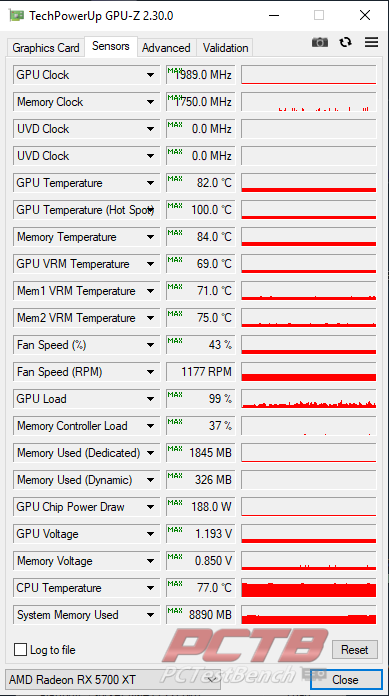
The GPU itself enjoys a nice supply of fresh air which is then exhausted right out the back of the case, so it only gets to a pretty typical 82C max.
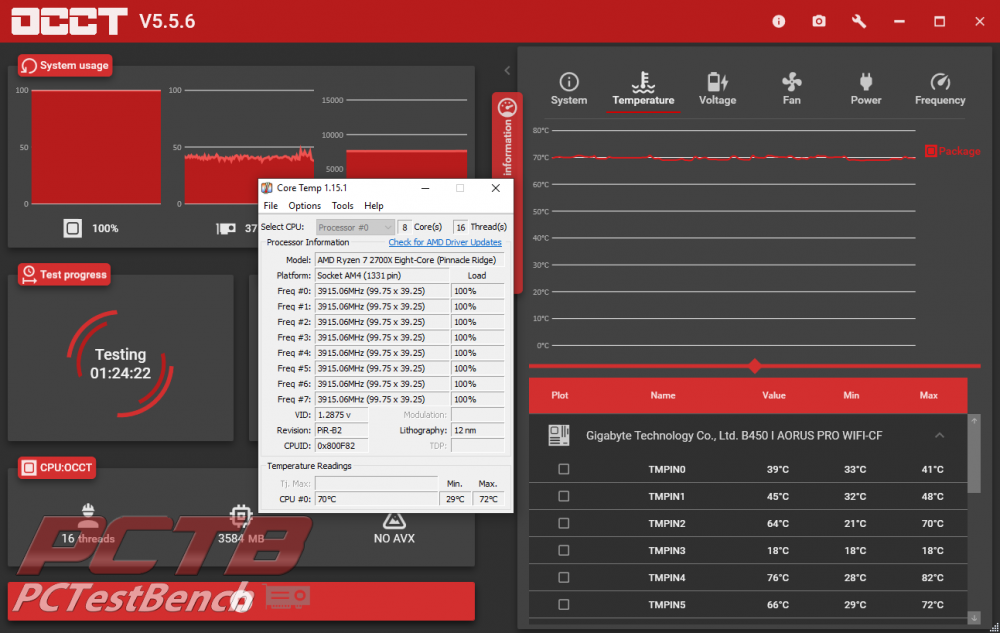
We let the system idle for an hour and switched to the mesh cover for the next test. We ran the same test (and yet again got distracted) and ended up with a max CPU temp of 72C, 4C cooler than with the glass cover. We don’t consider this significant for the overwhelming majority of users.
Even if you keep your system pegged out for hours at a time rendering, you likely won’t see any performance difference unless you are overclocking to the bleeding edge using either top cover. It’s great to see that this choice is largely aesthetic with a minimal performance impact. It shows that the ERA has a pretty solid airflow.
Check Out Our Amazon Store with Modders Inc
Please Support PCTestBench as Every Purchase Helps